The Complete Guide to Natural Disaster Preparedness: Earthquake, Hurricane, Tornado, and Flood

Why This Is Non-Negotiable
Every year, natural disasters kill thousands of people who thought it wouldn't happen to them. The earthquake that levels a city in 47 seconds. The hurricane that turns a coastal town into a debris field. The tornado that drops out of a clear sky and erases a neighborhood in under a minute. The flood that traps families on rooftops with no food, no water, and no way out.
Here's the brutal truth: FEMA won't be there in the first 72 hours. Emergency services will be overwhelmed. Cell towers will be down. Roads will be impassable. In that window — that critical 72-hour gap — you are entirely on your own. The people who survive are the ones who treated preparation as a lifestyle, not a hobby. The people who die are the ones who meant to get around to it.
This guide covers all four of the most deadly natural disaster categories. You live in earthquake country, hurricane country, tornado alley, or a flood plain — or some combination of all four. There is no excuse for being caught flat-footed. Let's build your system from the ground up.
What You Need Before You Start — Prerequisites, Gear, and Materials
Before you can prep for a specific disaster, you need a baseline kit and a baseline mindset. Disaster preparedness is not about panic-buying bottled water the night before a storm. It is a layered, systematic approach built over time. Here is what you need in place before anything else.
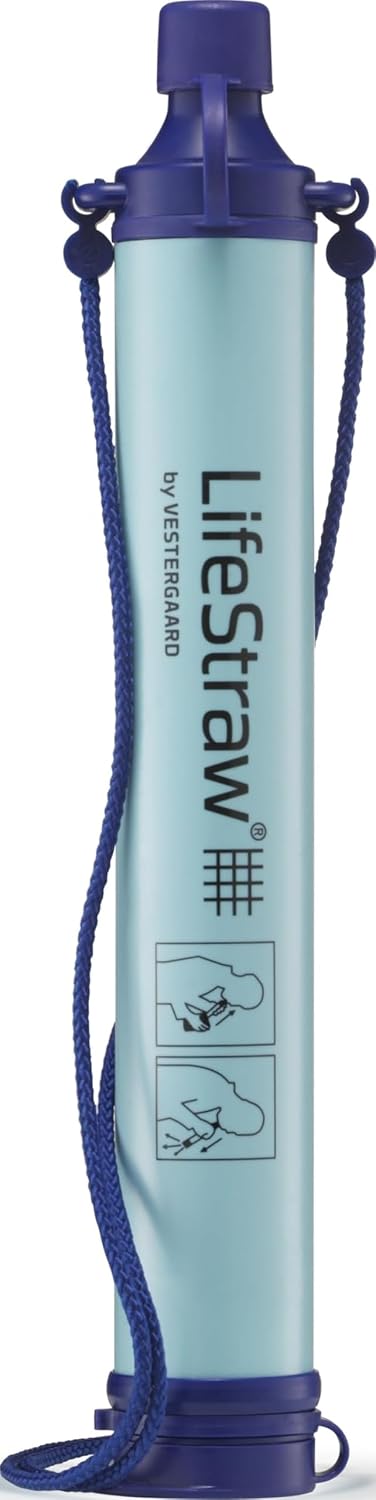
- 72-Hour Bug Out Bag (BOB): A quality backpack — look at 5.11 Tactical, Mystery Ranch, or Maxpedition — loaded with water (at minimum a Sawyer Squeeze or LifeStraw filter plus two liters stored), 72 hours of calorie-dense food (Mountain House freeze-dried, Clif Bars, peanut butter packets), a first aid kit, emergency cash in small bills, copies of critical documents in a waterproof bag, and a multi-tool like a Leatherman Wave.
- Home Emergency Kit: Separate from your BOB, this is your shelter-in-place supply. Minimum two weeks of food and water (one gallon per person per day), prescription medications, a hand-crank or solar-powered radio like the Midland ER310, and a quality flashlight with extra batteries or a rechargeable headlamp like the Black Diamond Spot.
- Communication Plan: Every family member must know two rally points — one near home, one outside your neighborhood. Designate an out-of-state contact as a communication hub. Text when you cannot call.
- Situational Awareness Tools: A NOAA weather radio (Midland WR120B is solid), a battery-powered or hand-crank AM/FM radio, and a weather alert app like Weather Underground on your phone with push notifications enabled.
- Vehicle Readiness: Keep your gas tank above half at all times. Store a get-home bag in your vehicle. Know at least three evacuation routes from your area.

The Process — Disaster-Specific Step-by-Step Preparation
EARTHQUAKES
- Secure your structure: Bolt your water heater and large appliances to the wall. Use furniture straps (available at hardware stores) to anchor bookshelves, cabinets, and large televisions. Move heavy items to lower shelves. Know where your gas shutoff valve is and keep a wrench zip-tied nearby — you must be able to shut it off within 60 seconds of a major quake.
- Identify safe zones in every room: The old "doorway" advice is outdated. Modern guidance from USGS is to Drop, Cover, and Hold On under a sturdy table or desk, or against an interior wall away from windows. Walk through every room in your home and identify your safe position now, before you need it.
- Pre-position supplies: Store a pair of thick-soled shoes and work gloves under each bed. Broken glass is a leading cause of post-quake injuries. You will not have time to find shoes after the shaking stops.
- Post-quake protocol: After the shaking stops, do not use open flame — gas lines may be ruptured. Check for structural damage before re-entering. Use your battery-powered radio for information. Expect and prepare for aftershocks of equal or greater intensity.
HURRICANES
- Know your zone: Every coastal county has evacuation zones (A through F or similar). Know yours cold. Sign up for your county's emergency alert system. When Zone A is called for evacuation, you leave — no debate, no waiting to see how it looks.
- Harden your home: Install hurricane shutters or cut pre-fitted plywood panels (5/8-inch CDX plywood minimum) for every window and door. Reinforce your garage door — it is the structural weak point in most homes. Use hurricane straps on your roof if you own your home.
- Water is your primary threat: Storm surge, not wind, kills the most people in hurricanes. If you are in a surge zone, evacuation is not optional. Fill your bathtub using a WaterBOB (a 100-gallon bladder insert) for sanitation water. Store your drinking water supply elevated above floor level.
- Power plan: A generator — propane is preferable to gasoline for storage stability — with at least 72 hours of fuel stored safely (outside, away from living spaces). Alternatively, a Jackery or Goal Zero solar generator for smaller power needs without the carbon monoxide risk.
- Evacuation execution: Leave early. Every hour you delay, traffic doubles and your options narrow. Have a destination — a friend's home, a family member's place, a pre-booked hotel outside the impact zone — confirmed before the storm develops.
TORNADOES
- Understand warning times: Average tornado warning lead time is 13 minutes. That is not enough time to do anything except get to your shelter. This means your shelter decision must be made in advance, not during the storm.
- Identify your shelter now: Interior room, lowest floor, no windows — a bathroom, closet, or hallway. If you have a basement, get into it and get under something sturdy. A FEMA-rated above-ground safe room or in-ground storm shelter is the gold standard. Prices range from $3,000 to $10,000 installed — it is the single best investment you can make in tornado country.
- Mobile homes are death traps: There is no safe place in a mobile home during a tornado. Period. Identify a community shelter or permanent structure within walking distance and know how to get there fast.
- Vehicle protocol: Do not try to outrun a tornado in a vehicle unless you have significant lead time and a clear perpendicular escape route. If the tornado is close and you have no shelter, abandon the vehicle and lie flat in a low ditch, covering your head. A ditch is not good — it is just better than a vehicle.
- Post-tornado hazards: Downed power lines, structural instability, gas leaks, and debris. Wear boots and gloves before moving through debris. Do not use candles or open flame until you have confirmed no gas leaks.
FLOODS
- Know your flood plain: Check FEMA's Flood Map Service Center (msc.fema.gov) to know your property's flood risk. If you are in a 100-year flood plain, you should have flood insurance and an evacuation plan.
- The six-inch rule: Six inches of moving water can knock you off your feet. One foot can sweep a small vehicle off the road. Two feet will float most full-size trucks. Never drive into flood water. Turn around, don't drown — this is not a slogan, it is physics.
- Vertical evacuation: If you cannot escape rising water, move to the highest floor of a sturdy structure. Bring your BOB, your radio, and signal devices — a whistle, a signal mirror, a bright orange tarp. Do not move to the attic without a way to break through the roof; people drown in attics every flood season.
- Flood-proof critical supplies: Store food and medications in waterproof bins elevated above floor level. Use waterproof dry bags (Sea to Summit or SealLine brands are excellent) for critical documents and electronics in your kit.
- Post-flood water safety: Assume all tap water is contaminated after a major flood. Boil or filter everything. Floodwater contains sewage, chemicals, and biological hazards. Any cuts from flood debris need immediate medical attention — waterborne pathogens can cause fatal infections.
Tips from the Field — Real-World Adjustments
- Layer your communication: Do not rely on a single system. Cell networks fail first. Text messages often get through when calls don't. A handheld ham radio (Baofeng UV-5R is a solid, inexpensive starting point — get licensed) gives you access to emergency repeaters when everything else is down.
- Cash is king post-disaster: ATMs fail. Card readers fail. Power fails. Keep $200-$500 in small bills in your kit at all times. Twenties and smaller.
- Know your neighbors: In a real disaster, your neighborhood is your survival network. Know who has medical training, who has tools, who has a generator. A community that works together survives at a dramatically higher rate than individuals acting alone.
- Pets require a dedicated plan: Most emergency shelters do not accept pets. Have a pet-specific kit — food, water, medications, kennel, documentation of vaccinations — and a pet-friendly destination identified in advance.
- Mental and physical condition matters: The gear means nothing if you panic. Practice your plans. Run through scenarios with your family. Mental preparation is the force multiplier that makes everything else work.
- Propane stores longer than gasoline: If you are running a generator, propane in sealed tanks stores indefinitely. Gasoline degrades in 3-6 months even with stabilizer. Plan your fuel storage accordingly.

What to Practice Now — A 30-Day Skill-Building Plan
- Week 1 — Audit and Inventory: Go through your entire emergency kit. Check expiration dates on food and medication. Replace what's expired. Identify gaps. Check your gas shutoff wrench, your flashlight batteries, your radio batteries. Write down what you are missing and order it.
- Week 2 — Family Drill: Run a full family emergency drill. Call a "drop, cover, hold" exercise. Practice your evacuation route. Time how long it takes to grab your BOBs and load the vehicle. Identify the friction points and fix them. Brief every family member on rally points and the out-of-state contact.
- Week 3 — Communications: Test your NOAA weather radio. Download and configure your weather alert app. If you have a ham radio, test it on a local repeater. Practice sending and receiving information without cell service — write down important contacts on paper, not just in your phone.
- Week 4 — Scenario Walkthrough: Pick one of the four disaster types most relevant to your geography and walk through the entire scenario mentally and physically. Where do you shelter? What do you grab? Where do you go if you evacuate? What do you do in the first hour after the event? Then do it again for the second most likely disaster in your area.
- Ongoing: Rotate your food supply every six months. Update your documents cache annually. Re-evaluate your plans as your family situation changes. Check your vehicle's get-home bag quarterly.
Preparation Is a Lifestyle, Not a One-Time Event
There is no finish line in preparedness. The disaster that hits you tomorrow doesn't care that you built a kit two years ago and never touched it since. Batteries die. Food expires. Family situations change. Roads shift. Evacuation zones get redrawn. The threat landscape evolves, and so must your preparation.
The survivors in every major disaster have one thing in common: they thought about this before it happened. They made a decision — a conscious, deliberate decision — to take responsibility for themselves and the people they love. They didn't wait for the government. They didn't wait for the alert on their phone. They were already ready.
That is what Red Dawn Survival is about. Not fear. Not paranoia. Competence. The deep, settled confidence that comes from knowing you have done the work, you have the skills, and when the ground shakes or the wind roars or the water rises — you and yours are going to make it through.
Start today. Audit your kit. Make your plan. Run your drill. The time you spend preparing now is the margin between survival and statistics.
🛒 Essential Survival Gear
As an Amazon Associate I earn from qualifying purchases.