How to Purify Water With Bleach in an Emergency (The Right Way, With Exact Measurements)

It was day three of a winter flood exercise in the Cascades, and one of my students — a sharp guy, former law enforcement, genuinely motivated — handed me a canteen and said he was good to go. I asked him how he purified it. He told me he added bleach. I asked how much. He shrugged and said, "enough to smell it." That canteen had roughly four times the safe concentration of sodium hypochlorite. Drink enough of that and you're not fighting a flood anymore — you're fighting chemical burns to your esophagus and a gut that's turning itself inside out. He didn't know he was wrong. That's the part that scared me most.
Water is the number one priority in any survival situation. You can go three weeks without food. You'll be lucky to go three days without water, and in heat or high exertion, that window collapses fast. When the grid goes down, when the pipes stop running, when the floodwaters rise and every surface source is compromised, most people are going to reach for whatever they have on hand. In the United States, that's often a jug of household bleach sitting under the kitchen sink. That's actually a solid instinct — but only if you know what you're doing. The difference between the right dose and the wrong dose is the difference between safe drinking water and a medical emergency you can't afford to have when hospitals are overwhelmed.
I've been teaching wilderness and urban survival for 22 years. I homestead on 40 acres in the Pacific Northwest. I've purified water in conditions that would make most people quit. And I'm writing this because the bleach method is one of the most misunderstood, misapplied skills in the entire prepper community. Let's fix that today.
The Mistake Most People Make
The single biggest mistake I see — and I've seen it repeatedly across training courses, community prep groups, and online forums — is what I call the "more is safer" fallacy. People assume that if a little bleach kills bacteria, more bleach kills it faster and more completely. So they double up. They eyeball it. They add extra "just to be sure." This is dangerous, full stop.
The second mistake, almost as common, is using the wrong kind of bleach entirely. I had a student show up to a field exercise with a jug of scented bleach — the kind marketed for laundry with "fresh meadow" additives. Another time, someone brought "splashless" bleach, which is thickened with surfactants and not rated for water treatment at all. These formulations contain chemicals you absolutely do not want in your drinking water. Using them won't just fail to make water safe — they'll add toxins to what you're drinking.
The third error is skipping pre-treatment. Bleach does not work well in turbid water — water that's cloudy or murky with sediment, organic matter, or debris. The chlorine gets consumed reacting with particulates instead of targeting pathogens. I've watched people dump bleach into brown floodwater and call it done. That water was not safe. Effective bleach treatment requires relatively clear water to begin with. If your source is murky, you must filter or settle it first. This isn't optional. This is science.
The Fundamentals — Step by Step
- Source and assess your water. Before anything else, look at what you're working with. Is it clear or turbid? Does it have visible debris, oil sheen, or chemical smell? Bleach treats biological contamination — bacteria, viruses. It does NOT remove heavy metals, chemical pollutants, or fuel runoff. If your water source is near an industrial site or has been contaminated by flooding through an urban area, bleach alone is insufficient. Know your threat.
- Pre-filter turbid water. If the water is cloudy, run it through a pre-filter before adding bleach. In the field, this means pouring it through multiple layers of clean cloth, a bandana, or a commercial pre-filter. Let it settle for 30 minutes in a clean container if possible. You want the water as clear as you can get it. This step dramatically increases the effectiveness of chemical treatment.
- Use only unscented, plain household bleach with 6–8.25% sodium hypochlorite concentration. Check the label. Clorox Regular-Bleach and store-brand equivalents typically fall in this range. Do not use bleach that is scented, color-safe, "splashless," or thickened. The active ingredient percentage matters — if you're using a higher concentration product (some industrial bleaches run 10% or higher), your dosage changes.
- Use the correct dosage. For 6–8.25% sodium hypochlorite, the CDC-recommended dosage is: 8 drops per gallon of clear water, or 16 drops per gallon of cloudy water. That's approximately 1/8 teaspoon per gallon for clear water. For a 5-gallon container of clear water, that's 40 drops — just under half a teaspoon. Use a medicine dropper for accuracy. A standard medicine dropper delivers approximately 1/16 teaspoon per 8 drops, which tracks. Do not estimate. Measure.
- Mix thoroughly and wait. After adding bleach, stir or shake the container well. Then let it sit for a minimum of 30 minutes before drinking. If the water is cold (below 40°F), extend the wait time to 60 minutes. Cold water slows the disinfection process. In a winter scenario, this matters a great deal.
- Check for chlorine smell. After the wait period, the treated water should have a faint chlorine odor — similar to a swimming pool, but mild. This is your confirmation that the treatment worked and residual chlorine is present. If you smell nothing, repeat the dosage and wait another 15 minutes. If the smell is overpowering, you used too much — let the water sit open for a few more minutes to off-gas, but this is a sign you need to recalibrate your measurement system.
- Store treated water correctly. Use clean, food-grade containers with tight-fitting lids. Keep them out of direct sunlight, which breaks down chlorine. Label with the treatment date. Treated water stored properly can remain safe for up to six months, though I'd aim to rotate it every three months in a real prep scenario.
- Document your bleach's age. Bleach degrades over time. Liquid bleach loses roughly 20% of its potency every year after the manufacture date. Bleach that's been sitting in your garage for three years may have dropped from 6% to under 3% sodium hypochlorite. If you're unsure of your bleach's strength, increase dosage slightly and always test for that residual chlorine smell. Better yet, rotate your bleach stock annually.

What You Actually Need
- Unscented Household Bleach (6–8.25% sodium hypochlorite) — Under $5
This is your primary chemical disinfectant. Clorox Regular Bleach or any store-brand equivalent with 6–8.25% sodium hypochlorite works. Buy several jugs and rotate them annually because bleach degrades. The reason this matters over other options is cost and availability — in a widespread emergency, bleach will still be on shelves long after bottled water is gone. - Medicine Dropper or Measuring Pipette — Under $5
Eyeballing bleach dosage is how people end up sick or poisoned. A standard medicine dropper calibrated to deliver consistent drop sizes is non-negotiable. I keep two in my kit — one in my home prep supplies and one in my 72-hour bag. You can get a pack of ten from any pharmacy for under three dollars. This is the cheapest insurance you'll ever buy. - Food-Grade Water Storage Containers — Under $30
WaterBOB bathtub bladders, 5-gallon food-grade jerry cans, or 7-gallon Aqua-Tainer containers from Reliance Products all fit this role. The key word is food-grade — not every plastic container is safe for water storage. BPA-free, HDPE plastic (marked with the recycling symbol and "2") is what you want. These containers also allow you to treat larger volumes at once, which matters if you're sheltering in place with a family. - Pre-Filter Cloth or Portable Sediment Filter — Under $30
A tightly woven bandana or a Millbank Bag works for field pre-filtration. For home prep, a basic gravity-fed sediment pre-filter adds another layer. You need this because bleach doesn't work well in turbid water, and in a real emergency, your water source may not be clear. Pre-filtration removes the particulates that would otherwise consume your chlorine before it can do its job. - Combination Water Filter (Backup) — Under $30 to Under $100
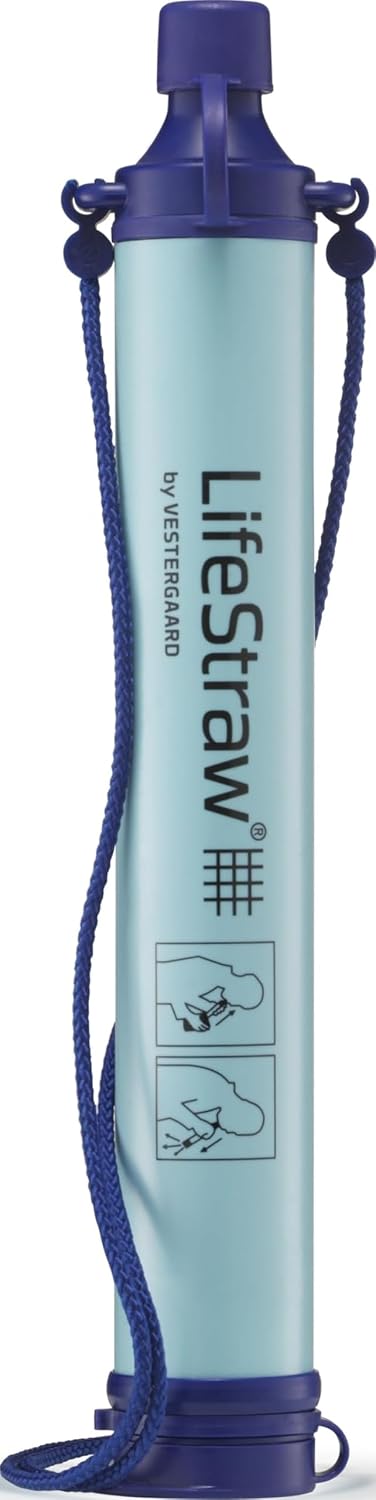
A Sawyer Squeeze or LifeStraw Mission paired with bleach treatment gives you redundancy. Filters remove protozoa like Cryptosporidium and Giardia that bleach does not reliably kill at standard doses. Bleach handles bacteria and viruses. Together, they cover the full spectrum of waterborne threats. The Sawyer Squeeze retails around $35 and can filter up to 100,000 gallons — it's a long-term investment disguised as a budget item. - Water Testing Strips — Under $15
Pool test strips that measure free chlorine levels give you a fast, objective confirmation that your treatment worked. After the wait period, a strip reading between 0.5 and 2 ppm free chlorine tells you you're in the safe zone. Above 4 ppm is too high. These are available at any pool supply store or online. I carry a small zip-lock bag of them in my field kit at all times.
Advanced Tactics (What Separates Survivors)
Layered treatment beats single-method reliance every time. The one thing that changed everything for me as an instructor was stopping the habit of teaching any method as standalone. Bleach plus pre-filtration plus a wait period plus a smell check — that's a system. Any one of those steps alone has failure points. In training, I saw a student nail the bleach measurement perfectly, but skip the pre-filter step on murky creek water. His stomach paid the price. Systems beat methods. Build a habit, not a trick.
Account for altitude and temperature. Cold water and high altitude both affect disinfection speed. I've run winter training at elevation in Idaho where water temps were hovering near freezing. Standard 30-minute wait times weren't cutting it. At cold temps, I now default to a 60-minute minimum. This isn't widely taught in quick-reference guides, and it gets people into trouble in winter bug-out scenarios specifically.
Know your bleach math before you need it. In a high-stress situation, you will not accurately do mental math under pressure. Before an emergency happens, sit down and pre-calculate the dosages for your specific container sizes — your 1-gallon jugs, your 5-gallon cans, your bathtub volume. Write them on a laminated card and tape it inside your supply cabinet. I have mine taped to the inside of my water storage locker door. When things go sideways, that card has saved me from making errors I'd otherwise make under adrenaline.
Boiling plus bleach is a legitimate combination in extreme contamination scenarios. In training I saw water sources after a landslide that were so heavily contaminated with organic matter that chemical treatment alone felt insufficient. Boiling first — one minute at a rolling boil, three minutes above 6,500 feet elevation — kills everything heat-sensitive, then treating with bleach afterward addresses any remaining biological risk and provides residual protection in the container. This is belt-and-suspenders for situations where you genuinely don't trust your source.
Bleach shelf life management is a real operational skill. Most preppers buy a jug of bleach, put it in storage, and forget it for five years. That bleach may be at 2% sodium hypochlorite by the time they need it. I rotate my bleach stock on a calendar — every 12 months, new jugs go in and old jugs go to the laundry. I also store bleach in a cool, dark location because heat and UV light accelerate degradation. This is basic logistics, but I've seen more people trip on it than almost any other prep mistake.

Common Questions
Q: Can I use pool shock instead of household bleach?
A: Yes, but the math changes significantly because pool shock — calcium hypochlorite — is typically 68–78% strength, not 6–8%. Use approximately 1/4 teaspoon of granular pool shock per 55 gallons of water after dissolving it in a small amount of water first to make a stock solution. Pool shock stores longer than liquid bleach and is more cost-efficient at scale, but the dilution math is critical to get right. I keep both in my long-term prep stores.
Q: Does bleach kill Giardia and Cryptosporidium?
A: No, not reliably at standard dosages. Cryptosporidium in particular is highly chlorine-resistant. This is exactly why I pair bleach treatment with mechanical filtration — a Sawyer Squeeze or similar filter with a pore size of 0.1 microns will physically remove both protozoa. Bleach handles bacteria and viruses. Filters handle protozoa. Use both and you've covered your bases.
Q: How long does bleach-treated water stay safe?
A: In a sealed, food-grade container stored out of sunlight, properly treated water is generally considered safe for up to six months. That said, I recommend rotating every three months in a real prep setup. Once opened and exposed to air, the residual chlorine dissipates faster — plan to use open containers within a few days and retreat if storing again.
Q: What if my treated water tastes terrible?
A: A mild chlorine taste is normal and safe. If it tastes strongly of bleach, you either used too much or didn't wait long enough — pouring the water between two containers a few times to aerate it helps off-gas excess chlorine. If the taste is off in a way that has nothing to do with chlorine — sulfur, metallic, oily — stop and reassess your source. Bleach treats biological threats, not chemical ones, and a strange non-chlorine taste may indicate a contamination bleach cannot fix.
Your Action Plan This Week
- Buy two jugs of Clorox Regular Bleach (6–8.25% sodium hypochlorite) this week — not scented, not splashless, not color-safe. Write the purchase date on them with a permanent marker right now so you know when to rotate them out next year.
- Buy a pack of medicine droppers at your local pharmacy — they're usually a few dollars for a pack of three. Put one in your kitchen prep supplies and one in your 72-hour bag today, not "later."
- Calculate and write down your dosages for every container you own — your 1-gallon jugs, 5-gallon cans, bathtub volume. Laminate the card or put it in a waterproof sleeve. Tape it somewhere you'll see it when you need it.
- Get a pack of pool test strips (the kind that test free chlorine levels) from a pool supply store or Amazon. Practice using them with lightly chlorinated tap water so you know what a reading looks like before you need it under stress.
- Pick up a Sawyer Squeeze or LifeStraw Mission filter — test it with tap water this weekend. Run water through it, check the output, make sure you understand how it works. A filter you've never used is a liability in a real emergency.
- Identify and clean at least two food-grade water storage containers — 5-gallon Aqua-Tainers or similar. Fill them with tap water, treat with the correct bleach dose, and practice the full process start to finish. Do it once now so it's muscle memory later.
- Audit your current water storage for turbidity threats — if you're planning to draw from a rain barrel, a creek, a pond, or any surface source, identify what you'll use to pre-filter. Get a Millbank Bag, several layers of tightly woven cloth, or a basic sediment pre-filter and store it with your bleach. The pre-filter and the bleach are a pair — they don't work without each other.
When I was coming up through Ranger training, an instructor told me something that stuck for two decades: the people who die in emergencies aren't always the people who lacked gear — they're often the people who had the gear and didn't know how to use it under pressure. Bleach purification is simple when you know the numbers, practice the steps, and build the habit before the crisis arrives. You owe it to yourself and to everyone depending on you to know this skill cold — not when the taps run dry, but right now, while you have the time and the clarity to get it right. That's what self-reliance actually looks like.
About the Author
Marcus Reed is a former Army Ranger with 22 years of survival instruction experience. He runs Red Dawn Survival to share field-tested tactics with the self-reliance community. Every technique here has been tested in real conditions — not a YouTube video.
🛒 Essential Survival Gear
As an Amazon Associate I earn from qualifying purchases.