Cold Weather Bug Out Bag Additions That Could Save Your Life This Winter
February 2011. Northern Minnesota. I was running a winter survival course with a group of eight students — experienced guys, most of them hunters and outdoorsmen who'd been in the woods a hundred times. We were two miles from the trailhead when the temperature dropped 22 degrees in under three hours. A front moved in faster than the forecast predicted. It happens. Weather doesn't care about forecasts. One of my students, a guy named Dave who'd been hunting whitetail in Wisconsin for fifteen years, started slurring his words about ninety minutes in. Mild hypothermia. His bag had everything the standard survival checklists recommend. Water filter, fire kit, emergency blanket, first aid. What it didn't have was a dedicated cold-weather layering system, insulated water bottles, or calorie-dense emergency food beyond a couple granola bars. We got him out. But it was close enough to make my hands shake thinking about it, and I've been doing this for over two decades.
That scenario plays out every single winter across this country. People bug out — or get caught out — with bags that were built for three seasons and never updated for the cold. The gear that keeps you alive in October will not keep you alive in January. The physics of cold are unforgiving. Your body is burning calories just to maintain core temperature. Moisture becomes your enemy in ways it isn't in summer. Metal fuel canisters fail. Water filters freeze solid and crack. Emergency blankets that work fine at 50 degrees become dangerously insufficient at 10. I'm not writing this to scare you. I'm writing this because I've seen good people make bad decisions based on incomplete kits, and I want you to have every advantage before you ever need it.
The Mistake Most People Make
The single biggest mistake I see — and I mean I see it constantly, from new preppers to guys who've been at this for years — is what I call the Universal Bag Fallacy. The belief that one bug out bag, built once, serves all seasons equally. You'll see it on every prepper forum. Someone posts their bag loadout, people clap in the comments, and nobody asks: what month is this bag built for? Because the answer matters enormously.
Here's why it fails in a real scenario. A standard 72-hour kit built around summer or fall conditions typically includes a lightweight emergency mylar blanket, a water filter like a Sawyer Squeeze, maybe a lightweight tarp or bivy, and 3,500 to 5,000 calories worth of food. In a cold weather evacuation — think January, you've got 48 hours to get from Point A to Point B on foot through snow and wind — that kit will fail you in at least three critical ways. First, a standard mylar emergency blanket reflects body heat but provides zero insulation. When it's 5 degrees and windy, you need trapped air, not reflected radiation. Second, your Sawyer Squeeze will freeze and crack the filter membrane if you let it get below 32 degrees even once. That filter is now garbage, and you may not know it until you're already depending on it. Third, cold increases caloric demand by 25 to 50 percent depending on exertion level and temperature. Your 3,500-calorie kit is now a 48-hour kit, not 72.
The fix isn't buying a second bag. It's building a winter add-on kit — a dedicated cold-weather module — that you swap into your bag each season. Structured, intentional, and tested before you ever need it.
The Fundamentals — Step by Step
- Audit your existing bag for cold-weather failures first. Pull everything out. Any water filter that can freeze needs to be either replaced with a chemical treatment backup (Aquatabs or iodine tablets work down to near-freezing) or kept inside an insulated pouch against your body. Any fuel canister — especially isobutane — loses significant pressure below 32°F. Isobutane mixed fuel (like MSR IsoPro) performs better in cold, but in extreme cold, a liquid fuel stove like the MSR WhisperLite Universal is the right call. Identify every failure point before you repack.
- Build your layering system around wool and synthetic insulation, not cotton. The rule is simple: cotton kills in cold. I tell every student the same thing. Three layers minimum — a moisture-wicking base layer (Merino wool 200-weight is my standard), a mid-layer insulation piece (Patagonia R2 fleece or equivalent), and a wind and waterproof shell. Add a dedicated puffy layer — down if you're staying dry, synthetic if there's any chance of wet conditions. Down loses all insulating value when wet. Synthetic does not. For a bug out scenario, synthetic is usually the right call.
- Replace or supplement your shelter system for cold. A standard emergency bivy reflects heat but doesn't insulate. Upgrade to a SOL Escape Bivvy or better yet, add a sleeping bag rated 10 to 15 degrees below the coldest temperature you expect to encounter. If you're in the Upper Midwest, that means a 0°F or -10°F rated bag. Compress it into a dry bag. A wet sleeping bag is a death sentence in extreme cold.
- Waterproof everything using dry bags, not just stuff sacks. Moisture is your #1 enemy in cold weather survival. If you cross a creek, slip, fall in snow, or your pack gets soaked, any cotton clothing or wet insulation will sap your core temperature rapidly. I use Sea to Summit Ultra-Sil dry bags for my sleeping bag, clothing layers, and fire kit. Non-negotiable.
- Add a minimum of 6,000 to 8,000 calories of cold-appropriate food. Cold reduces your appetite while simultaneously increasing your caloric need — a dangerous combination. Pack calorie-dense, fat-heavy foods. Pemmican, hard cheeses, nuts, full-fat jerky, freeze-dried meals (at least 600+ calories per serving), and quality chocolate. Plan for 3,000 calories per day minimum if you're moving in cold. Mountain House Pro-Pak pouches are a solid choice — they pack flat, have a ten-year shelf life, and require only hot water.
- Upgrade your fire starting kit for cold and wet conditions. Lighters fail in cold. Standard BIC lighters lose significant butane pressure below 32°F. Carry a Zippo with extra fluid, waterproof matches in a sealed container, and a ferro rod as your tertiary backup. More importantly, carry your tinder with you — Vaseline-soaked cotton balls in a small plastic bag, fatwood shavings in a waterproof pouch, or commercial fire starters like WetFire tablets. Cold, wet wood doesn't produce tinder. Bring it with you.
- Protect your hands, feet, and head — these are where you lose the battle first. Add wool liner gloves worn under waterproof insulated mittens. The liner gloves let you use your hands for fine motor tasks without removing all protection. For feet, add a second pair of wool socks (Darn Tough or Smartwool, minimum 250-weight) and vapor barrier liners if you're going to be stationary for extended periods. A balaclava and an insulated hat aren't optional. Forty percent of your body heat can escape through an unprotected head.
- Add an insulated water bottle and a metal cup for melting snow. Hydration in winter is critical and underestimated. You're losing water through respiration you can see — every breath in cold air is moisture leaving your body. A Nalgene with an insulated sleeve, or better, a Hydro Flask or similar double-wall vacuum bottle, keeps water from freezing during movement. A 900mL titanium pot or stainless steel mug lets you melt snow for water — remember that snow is roughly 10-to-1 by volume, meaning a full pot of snow gives you about 10% water by volume, so plan accordingly.

What You Actually Need
- Synthetic Insulated Sleeping Bag (-10°F rated): This is your primary life-saving piece of gear in a winter bug out. Temperature ratings on bags are survival ratings, not comfort ratings — buy 15 to 20 degrees below the coldest expected temperature. The Teton Sports LEEF is a solid budget option. The Western Mountaineering Alpinlite is a long-term investment. Budget tier: under $100 for entry-level / Long-term investment for quality.
- MSR WhisperLite Universal Stove: In temperatures below 20°F, canister stoves underperform or fail entirely. The WhisperLite runs on white gas, kerosene, or jet fuel and performs reliably in extreme cold. This stove has gotten me through conditions where canister stoves quit completely. It requires more maintenance than a canister stove, but it delivers when it counts. Budget tier: Long-term investment (~$150).
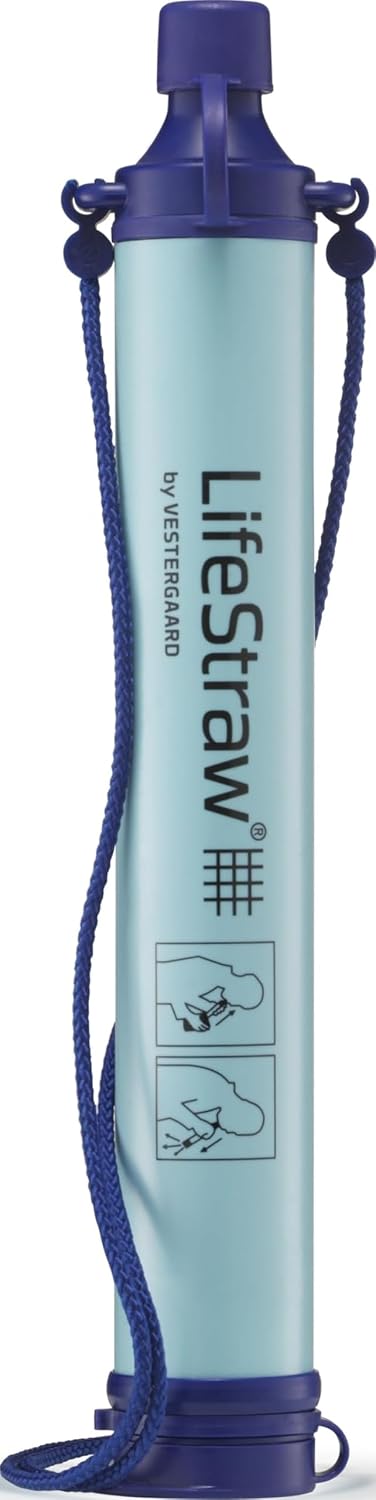
- Aquatabs Water Purification Tablets: Your Sawyer will freeze and fail. Aquatabs don't. They work in near-freezing water (allow longer contact time in cold — 30 minutes instead of the standard recommendation), they weigh almost nothing, and a bottle of 100 costs under $10. This is your cold-weather water backup, full stop. Budget tier: Under $30.
- SOL Escape Bivvy: This is not your standard mylar emergency blanket. The Escape Bivvy is a breathable, waterproof bivvy that reflects 70% of body heat while still allowing moisture vapor to escape, which prevents condensation buildup. It packs to about the size of a water bottle and weighs 8.5 ounces. I carry one as a backup shelter regardless of season now. Budget tier: Under $100 (~$60).
- HeatMax or HotHands Body Warmers (hand, foot, and body): Chemical warmers are cheap insurance. A pack of ten hand warmers runs about $10 and lasts 8-10 hours each. More importantly, toe warmers kept in your boots during rest periods can prevent the early stages of frostbite during low-activity periods. They're not a substitute for proper insulation — they're a backup when your insulation is working but losing the battle. Budget tier: Under $30.
- Waterproof Insulated Mittens with Liner Gloves: I use OR (Outdoor Research) Alti Mitts over Merino liner gloves. The combination lets me work a zipper, tie a knot, or handle gear with liners on, then throw the mitts back over for warmth during movement. Frostbite on your fingers ends your ability to do anything useful. Protect your hands like your life depends on it — because it does. Budget tier: Under $100 for quality set.
- Pemmican or High-Fat Emergency Rations: Commercial freeze-dried food is fine, but fat produces nearly twice the heat energy of carbohydrates — important when your body is burning calories to stay warm. Real pemmican (rendered fat and dried meat) is the most calorie-dense portable food that exists. You can make it yourself or buy it. Pack at least 500 to 600 calories of fat-dominant food per day on top of your regular rations. Budget tier: Under $30 for homemade / Under $100 for commercial options.
Advanced Tactics (What Separates Survivors)
Keep your critical gear against your body, not in your pack. In training I saw a student's lighter fail at -15°F because it had been in the outer pocket of his pack during a three-hour movement. The butane had chilled to the point where it wouldn't ignite. Your lighter, your phone, your compass with fluid that can freeze, chemical hand warmers that need to be activated — keep these in interior pockets against your body heat. The same applies to water. A water bottle in an exterior pack pocket will freeze solid in two hours in serious cold. Interior hydration bladders or insulated interior pockets are the solution.
Master the layering on/off discipline before you sweat. The one thing that changed everything for me in Ranger School during winter operations was learning to regulate body temperature before I started sweating, not after. When you sweat in cold weather, that moisture saturates your base layer and begins conducting heat away from your body 25 times faster than dry air. The discipline is this: before any sustained exertion, remove a layer. Stop before you feel cold, not after you feel hot. Vent before you sweat. Most people do the opposite and then can't get warm again.
Build a sleep system that can be deployed in under four minutes. Hypothermia risk spikes when you stop moving. If you're bugging out on foot and you need to stop — injured, lost, waiting out weather — you need to get into your insulation fast. Practice setting up your shelter and getting into your sleep system with gloves on in the dark. In training scenarios I've run, it's common for people to spend 15 to 20 minutes fumbling with gear in cold conditions that would have required 4 to 5 minutes in controlled practice. That extra 15 minutes of exposure can be the difference.
Understand the relationship between hydration and cold injury. Dehydration makes you significantly more susceptible to frostbite and hypothermia. In cold weather, you don't feel thirsty the way you do in heat. Your kidneys also produce more urine in cold (cold diuresis), meaning you're losing water even faster than usual. Force yourself to drink 4 to 6 ounces of water every 45 minutes during cold weather movement whether you're thirsty or not. If your urine isn't pale yellow, you're behind on hydration.
Use the buddy system for cold injury checks. You cannot see your own face. The early signs of frostbite — waxy, gray, or white skin on cheeks, nose, and earlobes — are visible to someone else before you feel them. In my experience, people in early hypothermia also lose judgment before they lose physical function, meaning they may not recognize that something is wrong. If you're bugging out with a group, build 15-minute check-ins into your movement. Check each other's faces, ask direct questions, watch for stumbling or mood changes. If you're alone, use a small mirror in your kit and check your face deliberately every hour.

Common Questions
Q: Can I just add a space blanket to my existing bag instead of a full sleep system?
A: No. An emergency mylar blanket is a last resort tool, not a sleep system. It reflects radiant heat but provides zero insulation — meaning in wind or extreme cold, the radiant reflection is overwhelmed by conductive and convective heat loss. It's better than nothing, but barely. A proper cold-weather sleep system requires trapped dead air — down or synthetic insulation. Use the mylar blanket as an outer vapor barrier or signaling device, not as your primary thermal protection.
Q: How do I keep my water from freezing during a winter bug out?
A: Three tactics. First, use a vacuum-insulated bottle like a Hydro Flask — these can keep water liquid for 12 to 24 hours in moderate cold. Second, keep the bottle inside your pack against your body or in a pack pocket insulated by your other gear. Third, add a small amount of electrolyte powder — it slightly lowers the freezing point and gives you another hour or two. In extreme cold, accept that you'll need to melt snow for water using your stove at rest stops and carry multiple insulated bottles. Never let a water source freeze and think you can just melt it in your mouth — that drops core temperature.
Q: What's the minimum temperature where I need to significantly upgrade my bug out bag?
A: I draw the hard line at 40°F. Below 40°F with wind and moisture, a summer bug out bag becomes inadequate. Below 32°F, cold injuries — frostbite and hypothermia — become a primary threat rather than a secondary concern. By 20°F, standard gear items begin failing: canister stoves, water filters, certain adhesives in first aid kits. Build your cold-weather additions to handle 10°F below the coldest temperature your region historically reaches, then add a buffer for bad luck and unexpected weather fronts.
Q: How much extra weight should I expect with a proper winter bug out bag?
A: Realistically, a proper cold-weather module adds 8 to 14 pounds to your pack. That's sleeping bag, insulated clothing layers, additional food, winter shelter upgrades, and the stove system. This is the honest number. There's no lightweight shortcut in extreme cold — you need the insulation mass. What you can do is ruthlessly cut non-cold-critical items from your summer loadout and replace them with winter-essential gear so you're not simply adding weight. Audit every item for cold relevance. A lightweight emergency water filter that will freeze and fail is dead weight in winter.
Your Action Plan This Week
- Pull your current bug out bag out today and temperature-test every item mentally. Write down every item that would fail, freeze, or become inadequate at 15°F. This is your upgrade list. Don't buy anything yet — know what you need first.
- Replace or supplement your water purification for cold weather. Order a bottle of Aquatabs (Potable Aqua brand, 50-count is fine for a start) and store them in a small waterproof bag inside your first aid kit. Test one in a glass of tap water so you understand contact time and taste before you need them in the field.
- Check your sleeping bag rating against your regional worst-case temperature. If your bag is rated above 20°F and you live anywhere that sees hard winters, you have a gap. Research one synthetic bag rated to 0°F or below this week — you don't need to buy it today, but know which one you're getting and know the price.
- Build a fire kit upgrade in a single waterproof bag. Get a small dry bag or heavy-duty zip-lock, and add: a Zippo lighter with a small bottle of extra fluid, a ferro rod (Light My Fire Scout 2.0 is solid), a pack of WetFire tinder tabs or a bag of Vaseline-soaked cotton balls, and waterproof matches as a fourth backup. Label it FIRE — COLD WEATHER and put it in your bag's brain or top pocket.
- Add one week's worth of HeatMax toe warmers and hand warmers to your kit right now. These are $10 to $15 at any Walmart or sporting goods store. They take up almost no space and could prevent frostbite if your insulation fails during a rest stop. Buy them this week.
- Test your layering system on a cold day this month. Put on your full cold-weather layering system and take a 90-minute walk when the temperature is below 35°F. Pay attention to where you get wet with sweat, where cold air penetrates, and what your hands and feet feel like. Real-world testing before an emergency reveals gaps that gear lists never will.
- Set a calendar reminder for April 1st to swap back to your three-season kit. Winter additions add weight you don't need in summer. Build the discipline of seasonal audits into your routine — fall and spring, every year, review and swap. Your bag should match the season you're actually in, not the season you built it for three years ago.
I've been doing this for 22 years, and the truth I keep coming back to is simple: cold doesn't care how prepared you think you are. It cares about what's actually in your bag and what you've actually practiced. Dave made it out of that Minnesota woodline because we had the skills and a group to manage the situation. When you're alone, there's no margin. There's no one to notice the slurred speech, no one to get you moving, no one to share body heat in a bivy. The only thing standing between you and a cold-weather casualty statistic is the work you put in before the temperature drops — and that work starts right now, not when the storm rolls in.
About the Author
Marcus Reed is a former Army Ranger with 22 years of survival instruction experience. He runs Red Dawn Survival to share field-tested tactics with the self-reliance community. Every technique here has been tested in real conditions — not a YouTube video.
🛒 Essential Survival Gear
As an Amazon Associate I earn from qualifying purchases.